


Copper Penny Oxidation Lab
Copper Penny Oxidation Lab
Before beginning this lab, I announce a good week in advance that I will need copper pennies dated 1982 or older. I also give them 1 extra credit point per penny that they can donate to science. I did learn however after my first year, that you need to cap it. Otherwise you have those students who can raise their grade significantly after bringing in 100. I did not expect that the first time I did this. I now cap it at 5 per student. This also spread the points around.
The reason you need copper pennies 1982 or older is because you are looking for pennies with a high concentration of copper in them. After 1982 pennies were mostly zinc and very little copper in them. If you don't personally verify the dates though, some newer pennies will sneak in.
First teach students that oxidation is a chemical weathering process where oxygen causes a chemical reaction, sped up by weak acids and water. Clicking this link will take you to the discussion of chemical weathering. During this discussion I strongly stress to the point of ridiculousness, that oxygen is the key to oxidation. The reason for this is because students aren't given very many instructions on how to complete this lab. Most end up doing it incorrectly, which is actually OK, because it allows us to pick apart what happened with their oxidation results.
On a table, I have tiny cups or containers, tap water, salt, dilute hydrochloric acid, vinegar, and distilled water. I let the students know that they are to have a control, and two variables. This is to remind and give practice to students that they should change only one variable at a time and that a control is used to compare the results of their variables.
I let them know in advance that most students fail at completing this assignment the way a scientist would and that their goal is to dazzle me and show me that they understand the scientific method. The only other instruction is that whatever question they try to answer, they just need to demonstrate what oxidation is and does to a penny.
The flaw that most students make right away, is not planning ahead and discussing in their groups, groups of no more than 4. Many students end up just completely inundating their pennies in HCl, water, or vinegar without think about the most important element in creating oxidation, which is oxygen. In fact given time and a lack of oxygen, the HCl and vinegar just clean the penny.
We let their experiment sit for a weekend or a couple of days, but if they do it correctly, they will see results easily the next day. Students will write their step by step procedures, make their observations, and write a statement of conclusion based on their results.
After we are finished, setting up the experiment I make the following statements to the class.
Stand up if...:
- You completely buried or drowned your penny.
- I explained that this takes away the oxygen from the penny so that it can't oxidize.
- Some variables however had colored liquid which showed that some chemical weathering was taking place.
- Used the same date.
- I had one group out of 35 actually use the same mint, which I told them they dazzled me.
- Could different mints and dates have slight variances in the amount of copper?
- Used pennies of similar current tarnishing or look.
- If they stood up, I let them know that they dazzled me.
- This is important because if a penny has already started to be tarnished then would it have a head start or not.
- Used the same amount of liquid in each container.
- If they stood up, I let them know that this dazzled me.
- Most of the groups did this by counting drops or using a graduated cylinder.
- You took pictures so that you could compare your results.
- If they said yes, I let them know that this dazzled me.
- This is important because over the weekend, they probably forget how their pennies looked. Now they could compare. I only got two groups out of 35 who did this.
In the end, this experiment is really meant to get students thinking of problems with how science can be done and how it can be done correctly. There are a few aha moments during this lab.
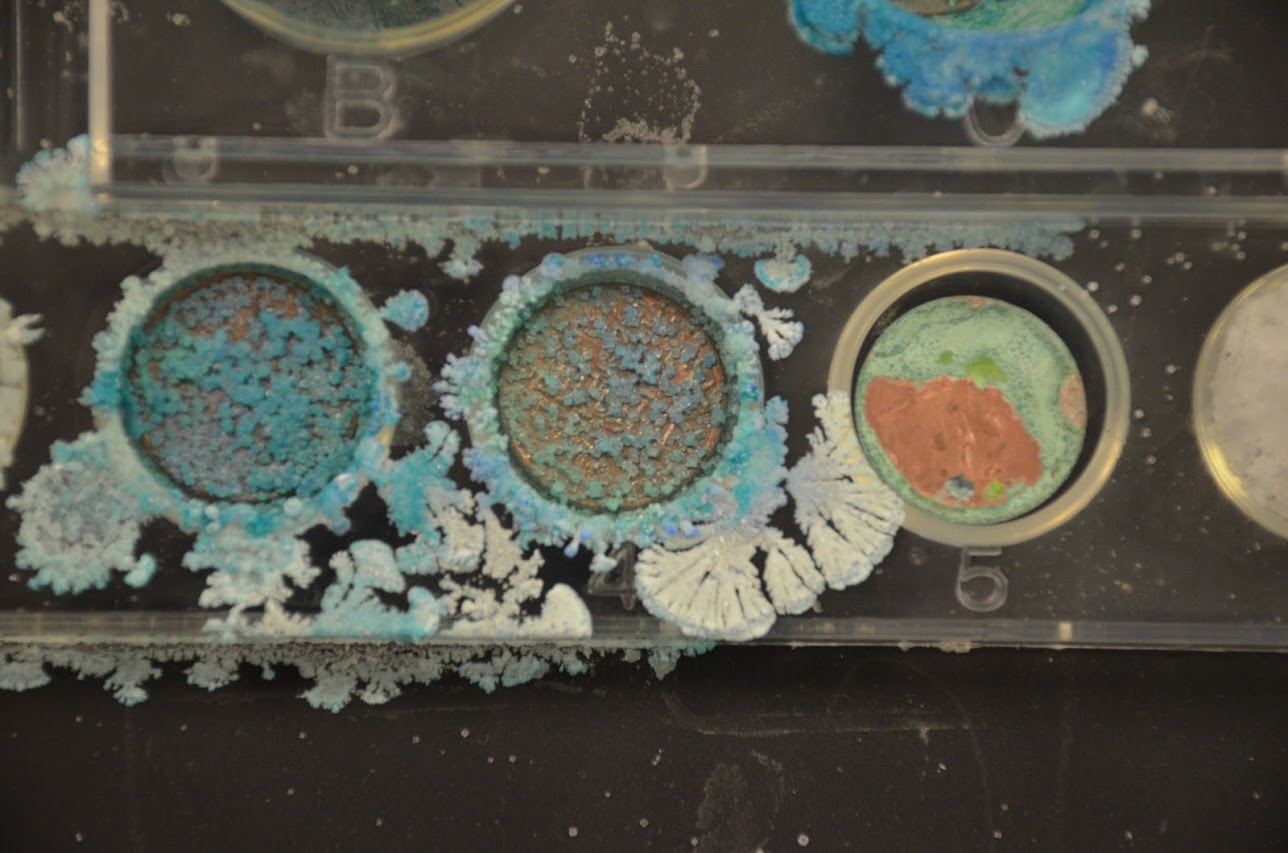
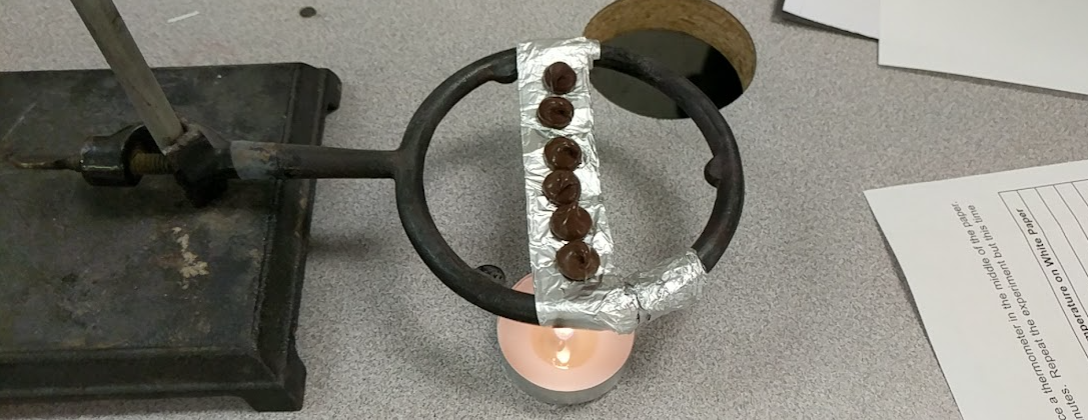
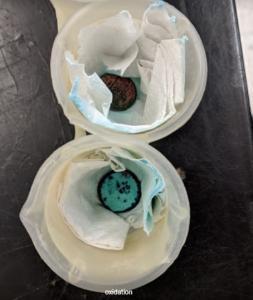
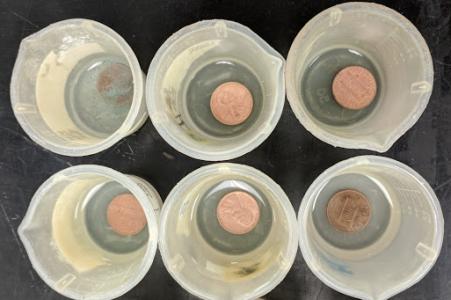
Below are images of samples from my students. I also added experiment that I do each year trying different variables.
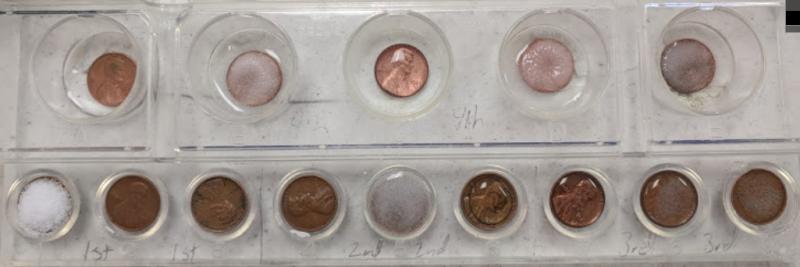
Top row left to right: 1975 with 20 drops of vinegar, 1973 salt and 20 drops of vinegar, 1981 20 drops of HCl, 1968 20 drops of HCl and salt, Unknown date with salt and 20 drops of distilled water.
Bottom row: 1962 with just salt, 1976 with 20 drops of distilled water, 1977 just left out in the open air, 1972 with 20 drops of tap water, 1982 20 drops of tap water and salt, 1962 with 5 drops of salt water, 1981 with 10 drops of salt water, 1976 with 15 drops of salt water, 1979 with 20 drops of salt water.
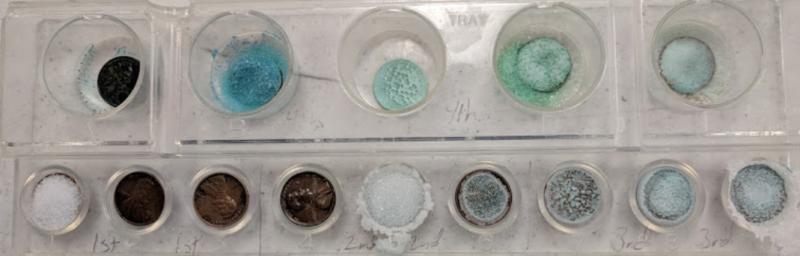
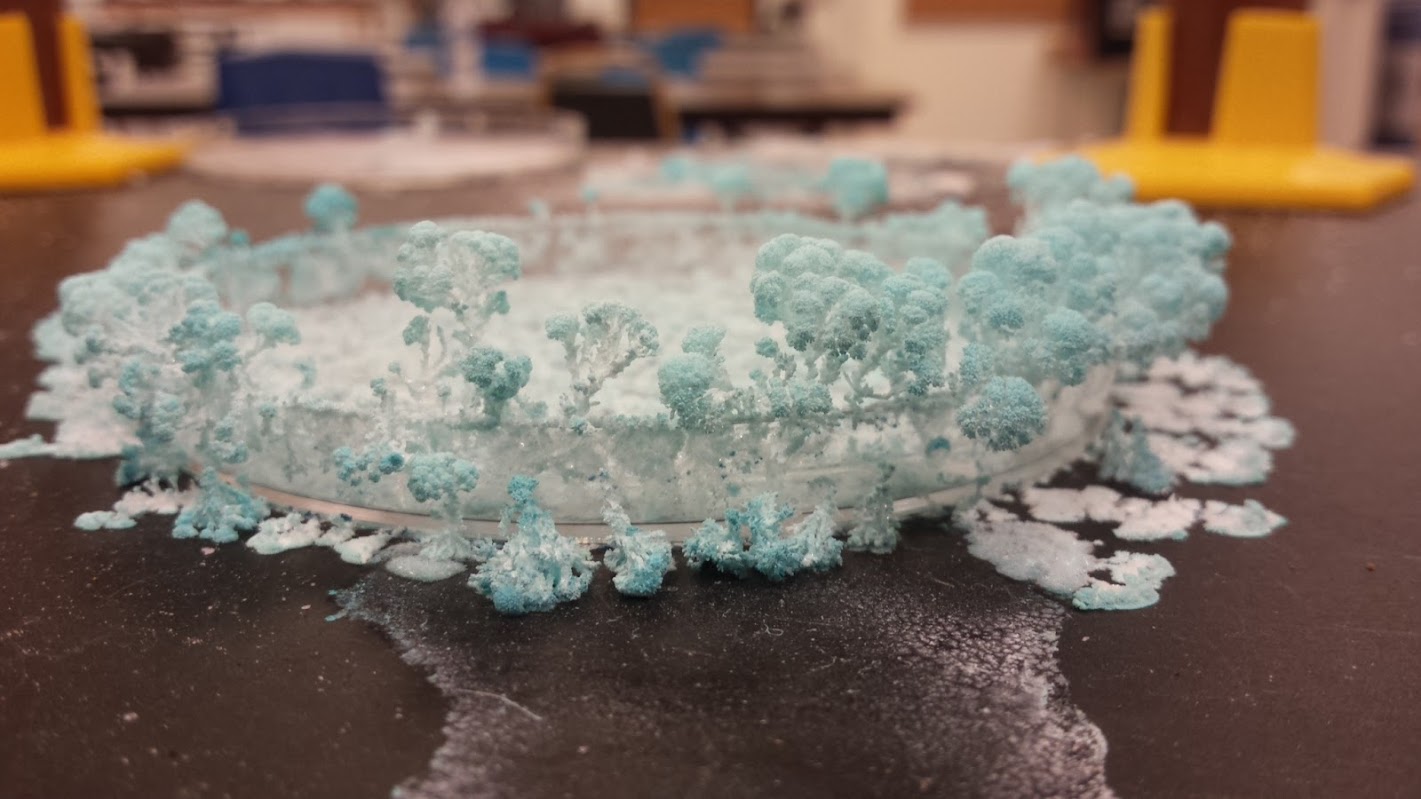
Vinegar and salt.
If you would like the penny oxidation lab paper I use in class you can purchase it at Teachers Pay Teachers for $0.35 cents.