


Day: 9 Understanding Mass, Volume, Displacement, and Density
Day: 9 Understanding Mass, Volume, Displacement, and Density
In this lab students will need to have access to a computer that can run "Flash" and the Phet Density Lab worksheet. The worksheet is designed to be pretty self explanatory. I am looking for students abilities to follow written instructions and ability to collaborate with a partner. By the time students get their machines, log on, Google Phet Density, and complete the task it took about 45 minutes for my smaller classes and 50 minutes for the larger ones. This allowed the rest of the time period to discuss key concepts that are explained below.
Students have already been given the vocab words needed for this lab, like density, mass, and volume. The lab will reinforce these vocabulary words naturally.
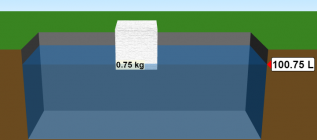
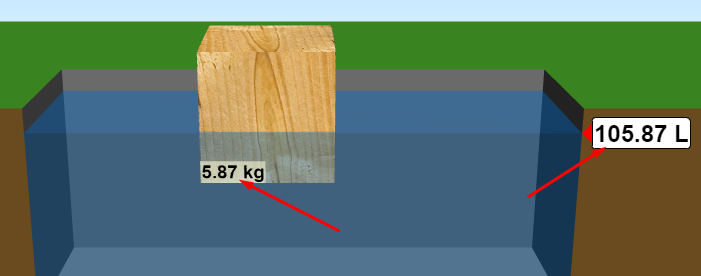
Question one asks: As the block of wood becomes larger, what happens to the volume of the tank? This question is meant to get students thinking and understanding that material floating in water increases the total volume. Students should also notice that the volume of the tank increases exactly the same amount as the volume of wood increases. I discuss this with the whole class after we are all finished.
At this points students will not use the simulation again until after question number 7. I get many students trying to use the simulation to solve questions 2-7, but these questions are designed to teach students the math involved in calculating density. Questions 2, 3, and 4 just help students understand that objects with a density of less than 1kg/L will sink and objects that are greater than 1kg/L will sink. The closer the objects are to 1 the slower they sink or float.
Questions 5-7 now have students simply calculate the density when given the mass and the volume values. They will divide mass by volume and this will calculate the density. The second part of each question then has students then determine whether the object will float or sink again.
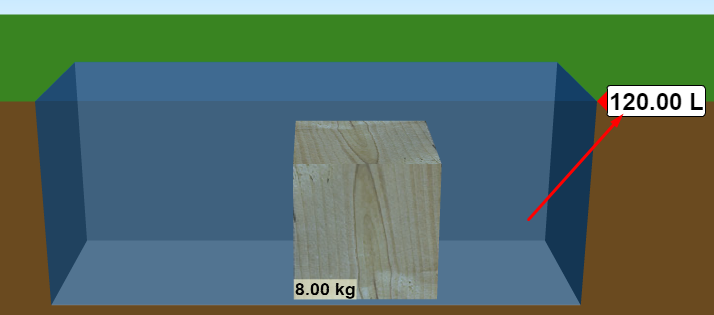
Students will then read how to figure out the volume of an object by using water displacement. They will understand how placing an object into the water will cause the overall volume to increase. This increase in volume is called water displacement and the amount of water displaced is equal to the volume of the object. Students then create a block of wood with the mass of 8kg and then determine the volume of the block. Students tend to get the answer incorrect because they didn't pay attention to the instruction that says to submerge the whole block of wood into the water.
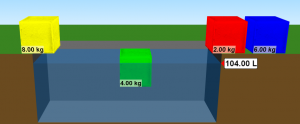
In the table below question 9, students will determine the volume and density of 4 different colored blocks if the mass is the same. They should notice that even though the mass is the same, the objects' volumes are different.

In the next section students are going to hypothesize which colored blocks will float if they have the same volume. This ends up being a straight guess because all the blocks are the exact same size and without knowing their mass, they can't possibly know which blocks will float and which will sink. Students will then test their hypothesis and determine which colors actually floated.
In the final section students will use a scale to measure the mass, use the water to measure the volume and then calculate density. This time students will click the "Show Table" options which contains a table of densities of a different materials and if they calculated the densities correctly, they will be able to determine which mineral they have.

This lab is very easy for students to complete and will do an excellent job at helping students understand what mass, volume and density are.